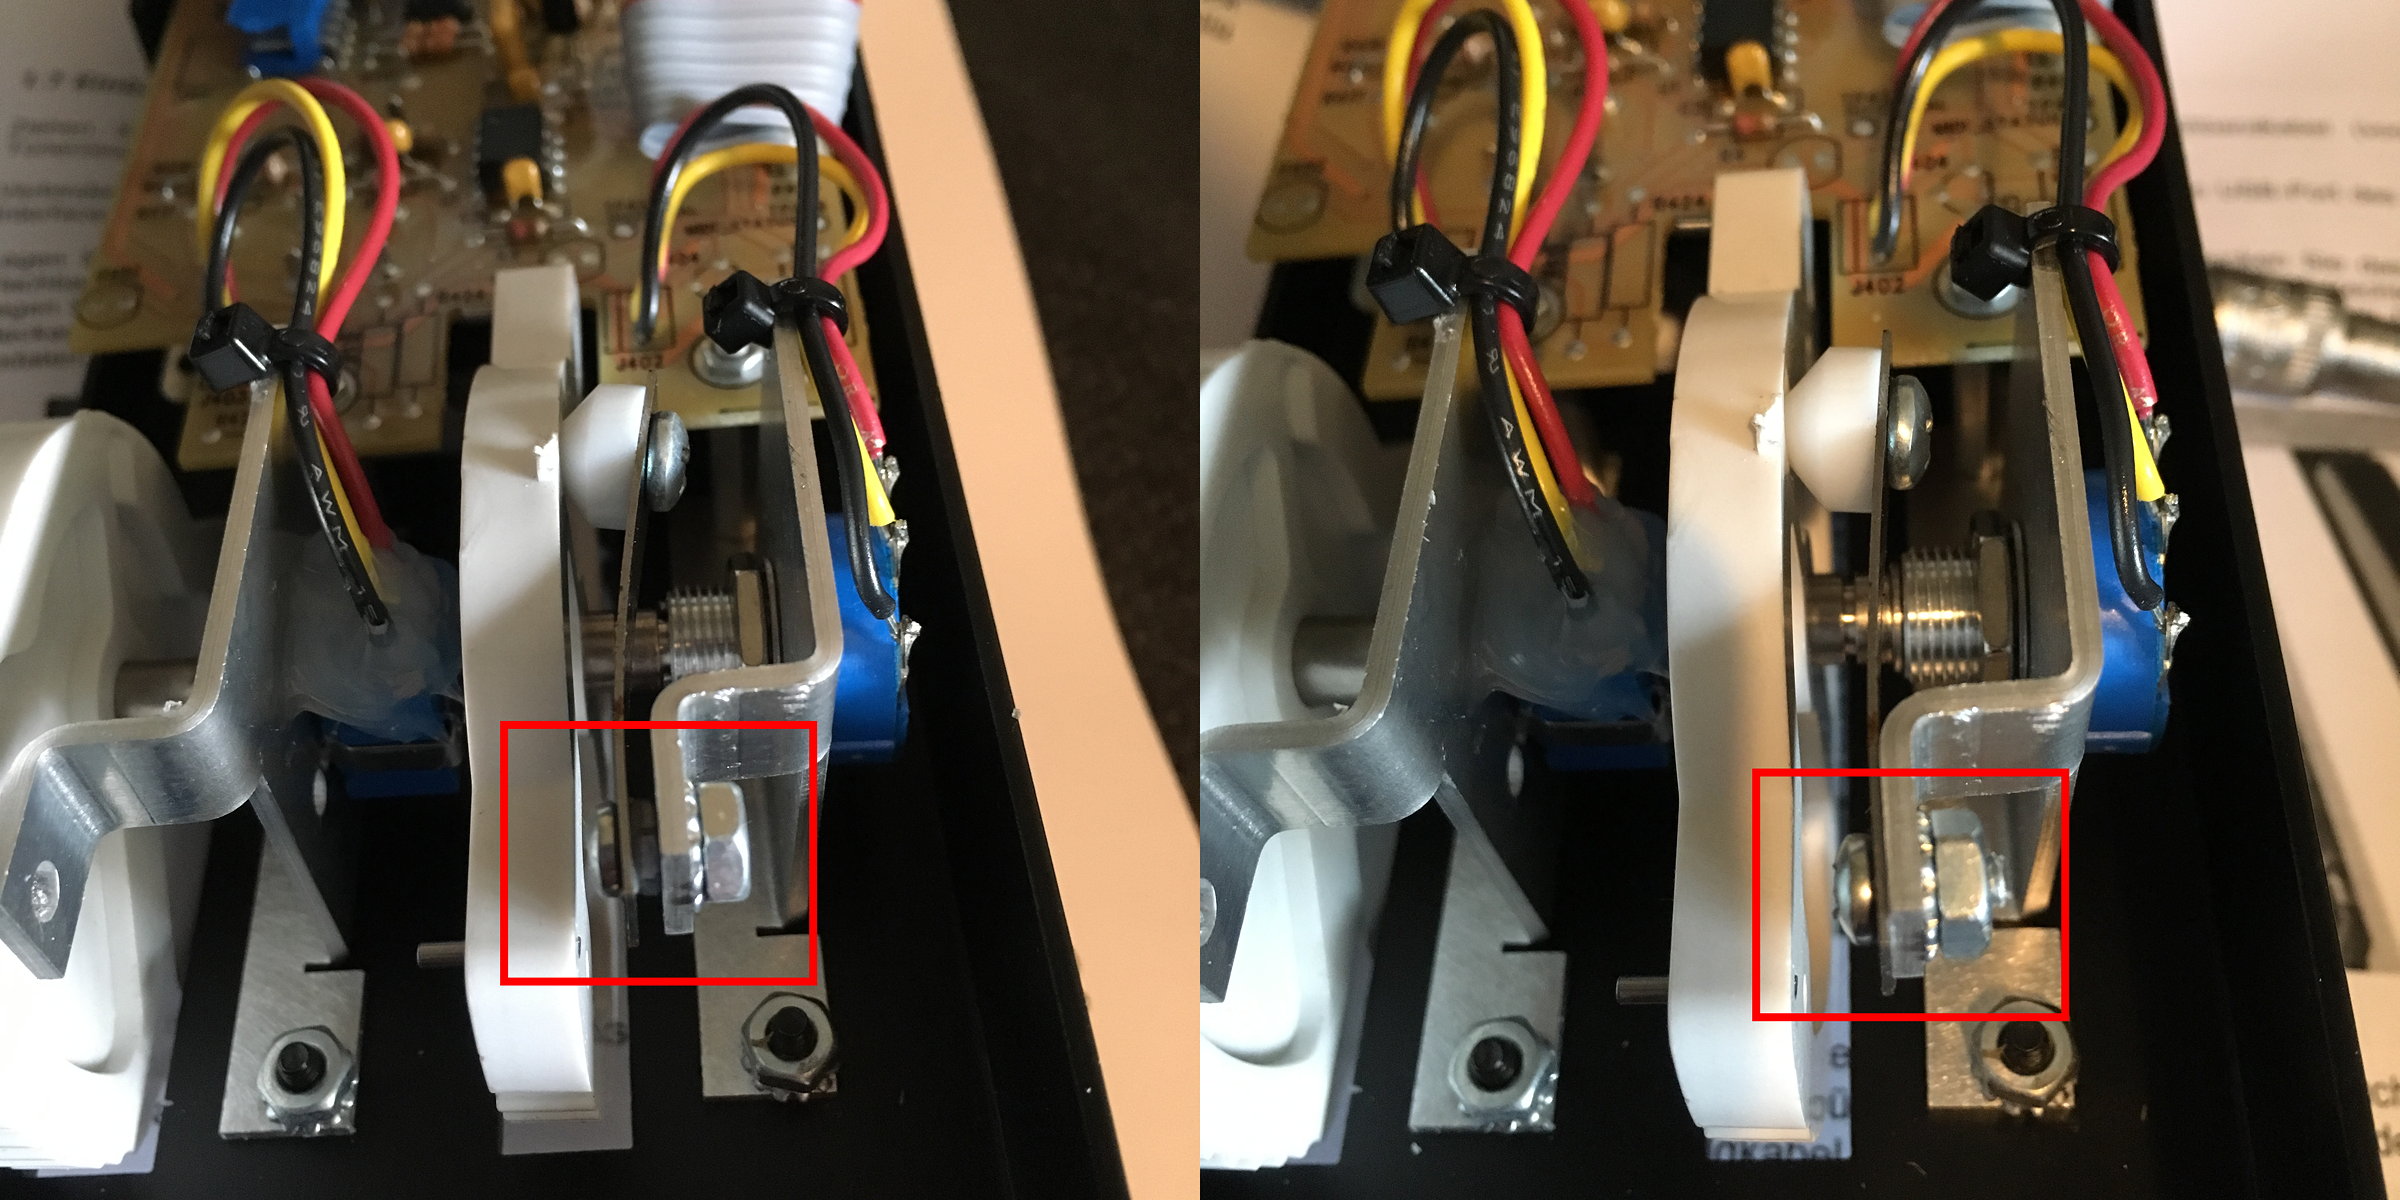
Here some before and after pictures I did when installing the MUSE in my second reissue Minimoog.
The left picture was before. You can see the nut between the metal pitchwheel holder and the center detent metal stripe with the white conus that does the detent in the pitchwheel groove.
I hope my words do make a bit of sense, as I am not a native english speaker.
Not really as simple as on the vintage Minimoogs.
There are two cables going from the left hand section to the keyboard (fragile aftertouch cable) and a board below the keyboard. And of cause one cable going to the panel. While you can unmount the left hand section on the original vintage Minimoogs just by undoing the two screws on the fron of the left hand section that hold the metal and the little wooden block, this is not possible on the reissue Minimoogs. If you don’t undo the aftertouch cable on the left hand section and the ribbon cable on the board below the keyboard, you will destroy your reissue Minimoog when pulling the left hand section.
*****warning ***
All on your own risk. I had to do it a bit different then described here, as I installed the MUSE while doing this mod. So the steps described here might not be the perfect right ones, but they give you an idea on how to do this. Notice all the cables and their orientation. Some photos will help you memorise this.
*** end of warning *****
First you have to undo the ribbon cable that goes from the panel into the left hand section.
Now undo the bottom plate.
Carefully (its fragile!) pull the blue jack of the aftertouch ribbon cable of the socket on the left hand section (it is most likely affixed by some glue). Don’t fold or pull the cable!
And you have to undo the ribbon cable that goes to the MIDI and keyboard logic board under the keyboard action. Only then you are able to undo the left hand section (beware of the shark edges cutting into the wood of your Minimoog).
Be sure to reconnect all the cables.
Secure the aftertouch jack with some undoable glue or alike.
Be sure to slide the left hand section all the way in and into the grove far in the back. If you are not into this grove, the metal left hand section will go down when applying vertical downward pressure to the back of the left hand section. And be sure to redo all screws into the wood (8 for the bottom plate; 2 for the left hand section) without drilling a new hole into the wood.
If you visit me here in Germany near Stuttgart, I offer to do this mod for you for free.
The Muse, and removing that nut, made the reissue much more playable for me. Aside from getting rid of the pitch problems at center, and making the center detent usable, you can set the pitch bend range to your desired interval, and use aftertouch to bring in modulation in an amount set by the wheel. It does more, but these things alone are worth their weight in gold.
It took myself and a friend about an hour to install. No soldering, works like a charm.