Before n' after Minimoog D

Just thought I’d share some pics of a Minimoog D after some care.

There’s real wood under that paint!

For some hi-res shots of this Mini (after I added the badges), go here:

http://www.minimoog.net/IMG_3475.JPG
http://www.minimoog.net/IMG_3476.JPG

I’ll probably replace all the knobs with new ones too, but these were quicky photos.

Another job well done. That wood has a nice grain to it.

Lovely. How’d you get the paint off?

I have a BC Rich bass guitar someone gave me that someone painted w/ pink and purple nail polish. Nail polish remover?

Thanks MC and HB3.

I stripped it using paint remover.
It was sanded with two grains of paper, received a dark Dutch oil finish and was sealed with a light spray of polyurethane.

I think Moog may have painted these later ones because not all the pieces of wood appear to be the same type.
If the owner was really picky, he’d probably have had a new case made.
But this is a good compromise.

Very nice, Kevin! :open_mouth: I guess Cheerios isn’t the only thing multigrain. :laughing:

Wow, that looks amazing.

I know this topic still causes debate on the forums, but I can see why people would want to buy that over the old-school

If Moog reissued it even with the same sound engine as the Voyager, just a different casing and setup, I know which one I’d choose.

beautiful job kevin! was this the mouse infested moog?

was this the mouse infested moog?

No, but that one was done at the same time.
I’m still repairing what’s left of the keyboard action, so it’s not together yet.

The one shown has a bit nicer wood.
It’s younger and has seen less wear.
No mice either… :slight_smile:

Wow ! That looks super, it doesn’t get any better than that !

Too sexual for my virginal eyes .

Too sexual for my virginal eyes .

What? Stripping wood?
I always thought they went together.

Great job Kevin! Wow!

How is the sound before and after? Did you have to do much with the electronics?

How is the sound before and after? Did you have to do much with the electronics?

As you’re aware, sound is subjective.
Many clients have stated their synths sound better after being serviced.
I’ve yet to hear someone remark one sounds worse.

The Mini was completely recapped. (new electrolytic caps.)
That’s probably the only thing done directly to the signal path.
However, there’s a bunch of things done that affect stability, accuracy and reliability.

For example, the octave range switches used by Minis have a 2nd, unused set of contacts.
Those are doubled-up with the first set and so provide two contacts instead of one.
This increases their reliability and eliminates any glitching between settings.
The PC boards were cleaned and resoldered in many places.
Many pots and trimmers were replaced, as well as some fixed resistors.

Everything basically gets attention.
Cleaning, tightening, straightening, etc.
Whatever it needs.
But I don’t change the sound other than bringing it back to original specs.

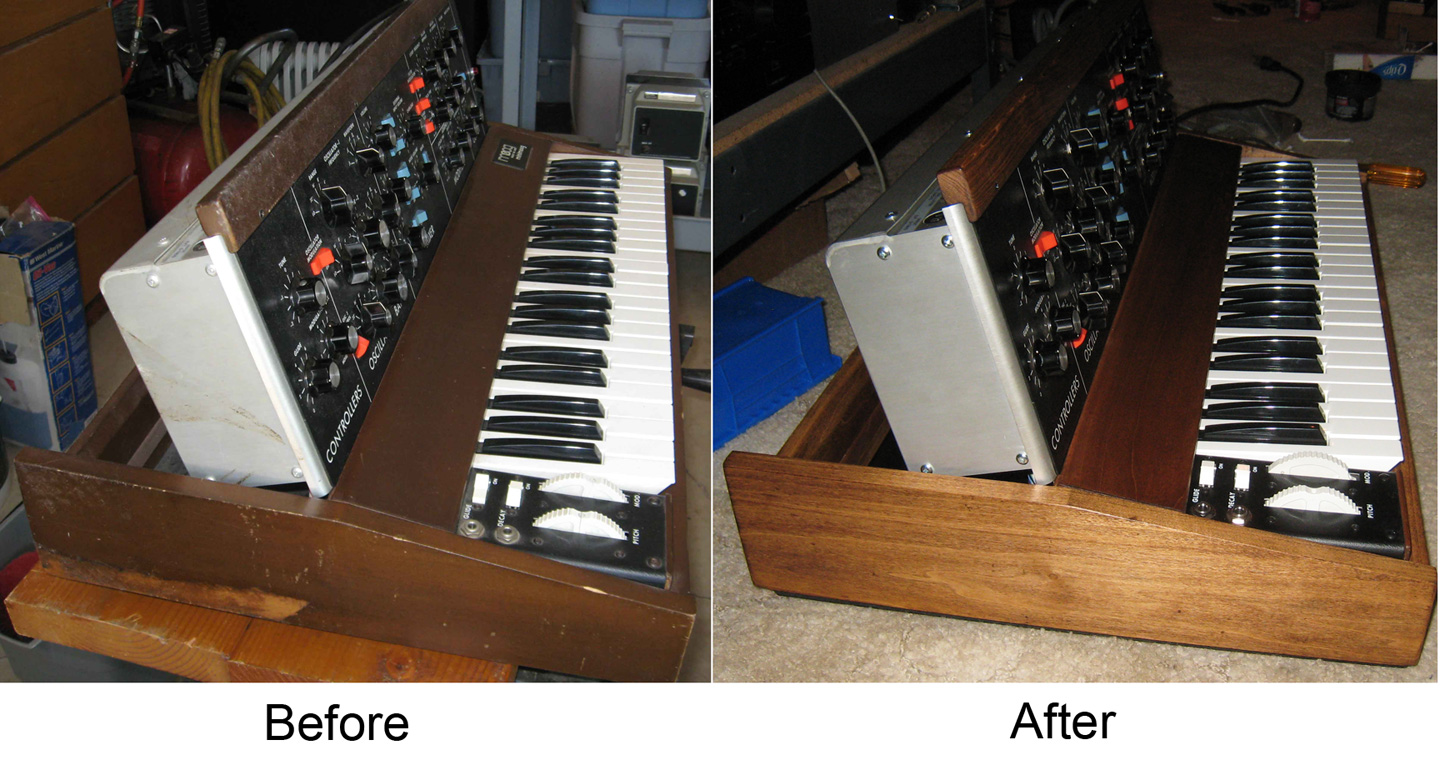
Btw, this particular Mini was bashed from shipping.
The right side where the power cord comes in was very badly dented.
The switch for 115/230 AC was destroyed.
I was able to bend everything back and replace that switch.
One probably couldn’t tell it was ever hit now.

Fwiw, there is one issue I sometimes address that can affect the sound.
Most Minis have envelopes where the attack portion overshoots the sustain level.
This is likely the “bump” of sound that Craig Anderton (and later Synths.com) remarked about being the reason Minis sound punchy.
But I prefer envs to work as stated and designed.
So sometimes I will mod the filter env to be “correct.”
I don’t touch the VCA env usually.
If there IS some punchiness due to this error on the VCA, I don’t remove it.
But filter envs are more obvious.

To check if your Mini D has this issue, set up the filter and env like this:
Long attack, min decay, max sustain.
Turn up the emphasis (resonance) and listen to the “siren.”
(Turn the frequency down enough that it doesn’t go past your range of hearing, of course.)
If the issue is present, the pitch will go up through the attack portion, then fall back to the sustain level.
A normal env would rise until it reached the sustain level and then stay there.
But with this issue, the attack portion rises past the sustain level, then drops down.
It’s very noticeable and can frustrate a player by suggesting their sustain control doesn’t go high enough.


One warning: Once you set it up to check this, it’s often hard to ignore afterward. :smiling_imp:

What a way to drum up business! Not only are you awesome at being a synth tech, you are a great marketing genius as well! :open_mouth:

What a way to drum up business! Not only are you awesome at being a synth tech, you are a great marketing genius as well!

I guess that’s why a janitor makes more money than a synth tech? :confused:

(glad the janitors of the world don’t drum up their own business though…)

Seriously, if someone wants to mod their own env(s) for this, they can write me for the info.
I just don’t recommend a novice attempt it.
This ain’t janitorial work! :wink:

There’s no doubt in my mind about that! :open_mouth: BTW, did you get my e-mail I sent last night? Hotmail was being buggy…again…or, rather, still. God I hate Microsoft. :unamused:

:laughing:

Great job, Kevin! And thanks for taking the time to post all of the additional imformation!

Question: How do you remove the Moog emblem/patch off of the wood without damaging it or the wood? I may take a stab at refinishing my Mini’s wood. I’ve been assuming that mine is ugly grainless pale pathetic wood since it’s a later model but, maybe I’ll get lucky! I suppose even if it’s crappy wood it will still look better than it does now!

I’ve got a new set of key tops and bushings and I might get a new set of knobs. So, you recommend just replacing all of the electrolytics?

Thanks much!

Too sexual for my virginal eyes .

Did I forget to mention that Minis are screwed, but never nailed? :wink:


How do you remove the Moog emblem/patch off of the wood without damaging it or the wood?

I use a citrus solvent called De-Solvit. (http://www.orange-sol.com)
You let it soak in underneath the badge(s), then use a scraper to lift it off.
If worried about the finish, use a teflon spatula.

You can also use heat, but it’s possible to deform the vinyl.
I don’t try heat unless it’s a last resort.


I’ve got a new set of key tops and bushings and I might get a new set of knobs. So, you recommend just replacing all of the electrolytics?

Fwiw, I’ve lately been seeing and hearing where many people have done their own bushings and they’ve put them on upsidedown.
Even one auction showed them installed incorrectly in their own photos.
This is just a general warning. I don’t mean you specifically.
There’s also just a lot that can go wrong and getting out of trouble is almost always easier than fixing it.
I may be able to sell you some knobs.
I’m quickly running out of the large VCO 2 & 3 tuning knobs though.

I do recommend replacing all of the electrolytics, but I’m not sure the word “just” applies. :slight_smile:
There’s potential problems possible with any surgery.
I have a Mini here now that’s the poster child for things done incorrectly.
Key tops put on incorrectly, bushings, etc.
It’s more effort to correct such work usually and this doesn’t translate to the original idea they began with: to save money.
If you can afford it, I’ll always recommend a pro for specialized work.

Thanks for the kind words.