4-tier 60HP Moog setup (with pictures!)
Posted: Sun Sep 11, 2016 7:36 pm
You build a three-tier Mother-32 setup. You're happy with what you got but one day you discover the joys of DIY. Suddenly you're faced with insufficient rack space. It feels silly to repack everything for an additional 60HP or so. It feels wasteful and not elegant to get another skiff or case for the new modules, especially if you're space constrained. What do you do?
You add a fourth tier. You buy another 60HP Moog skiff, and a $5 punched flat bar from HomeDepot. You cut it to length, remove the side walls from the Moog skiffs. You connect an additional flying board bus to uZeus, you pass it through the side of the skiffs. Now you only need to screw it all back together. You put the metal side walls on, which helps with module alignment. You put the flat bars next and finish with the gorgeous wooden plates. Here's how it looks all screwed together:
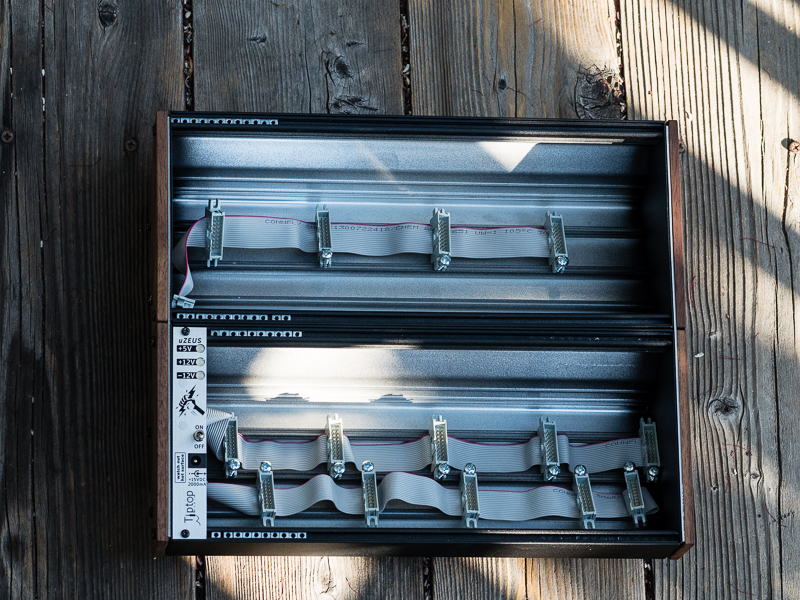
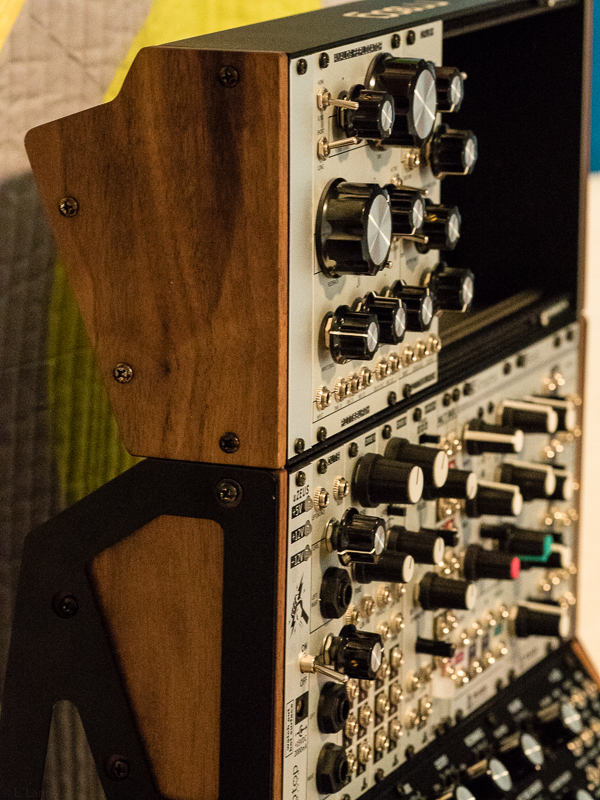
Note how I screwed the flying bus boards to the skiff for a little extra tidiness inside. Note how I put the uZeus on the left to leave more space on the right for patch cable connections (more elegant with the Mother-32's patch bay). Speaking of the Mothers, you need to secure the new double-skiff to the 3-tier frame! To do this, unscrew just one screw on each side, attach to the frame and screw back in. Then unscrew the remaining two screws (the hole is big enough for them to go through), insert the washers and screw back in. Here's how it looks like:
The final setup is fully operational, requires the least desk space and is the least costly, as it reuses a single uZeus and your existing skiffs. Here's how it looks like as of today (note the silver bars between the wood and the black side walls of the case):
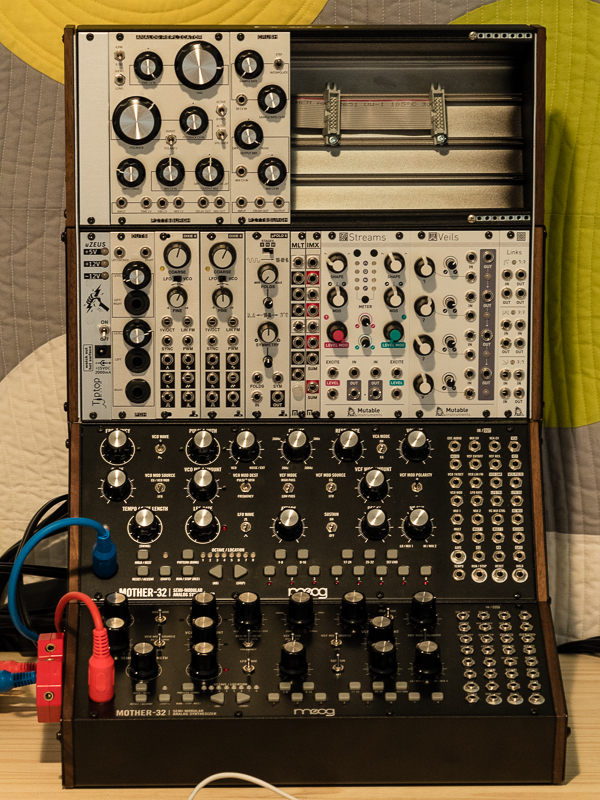
So, if anybody is wondering if it's possible to power two skiffs from one uZeus: it is. If anybody is wondering if you can attach an extra skiff to the three-tier setup in a way that looks nice and doesn't require drilling, welding or gluing: it is. If anybody is wondering if the resulting setup is stable on the desktop: it is. Arguably, the trickiest bit for me was just cutting the flat bars to length. The rest is pretty easy if you're careful with alignment. This setup adds a little width to the skiffs but fortunately the metal frame has enough tolerance for it not to cause any issues.
You add a fourth tier. You buy another 60HP Moog skiff, and a $5 punched flat bar from HomeDepot. You cut it to length, remove the side walls from the Moog skiffs. You connect an additional flying board bus to uZeus, you pass it through the side of the skiffs. Now you only need to screw it all back together. You put the metal side walls on, which helps with module alignment. You put the flat bars next and finish with the gorgeous wooden plates. Here's how it looks all screwed together:
Note how I screwed the flying bus boards to the skiff for a little extra tidiness inside. Note how I put the uZeus on the left to leave more space on the right for patch cable connections (more elegant with the Mother-32's patch bay). Speaking of the Mothers, you need to secure the new double-skiff to the 3-tier frame! To do this, unscrew just one screw on each side, attach to the frame and screw back in. Then unscrew the remaining two screws (the hole is big enough for them to go through), insert the washers and screw back in. Here's how it looks like:
The final setup is fully operational, requires the least desk space and is the least costly, as it reuses a single uZeus and your existing skiffs. Here's how it looks like as of today (note the silver bars between the wood and the black side walls of the case):
So, if anybody is wondering if it's possible to power two skiffs from one uZeus: it is. If anybody is wondering if you can attach an extra skiff to the three-tier setup in a way that looks nice and doesn't require drilling, welding or gluing: it is. If anybody is wondering if the resulting setup is stable on the desktop: it is. Arguably, the trickiest bit for me was just cutting the flat bars to length. The rest is pretty easy if you're careful with alignment. This setup adds a little width to the skiffs but fortunately the metal frame has enough tolerance for it not to cause any issues.