Memorymoog Revived!
Posted: Thu Dec 17, 2020 10:32 pm
Finally!
And, before anything else, thank you to Markyboard and everyone else here in in the groups that helped me figure out things as I went along. This was a big job, no question about it. A lot was changed, and I am sure it's been improved. I did a burn-in overnight after tuning all 6 voices and still tuning up perfectly. Decided to button her up and put her back in rotation with the other classics....
Final oscillator tuning and calibration:

New Noctua fan:
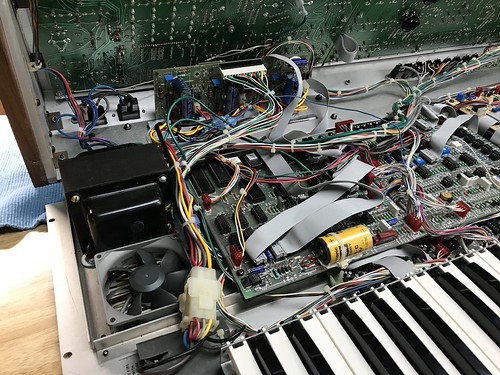
Voice boards (new sockets installed for all Curtis chips and all ribbon connectors, along with full re-cap and some 4016s replaced):

Close-up of voice cards with new trimmers installed:

2 of the 3 EPROMS for the 2.4 OS that broke. my. bawls. trying to burn until I gave in and got a good burner and eraser:

All buttoned back up:

Quite possibly the best thing any Memorymoog owner could see:

Of course, I still have my doubts because... Memorymoog... but, I'm honestly very pleased with how this all came out, and it really taught me a lot in terms of really reading and understanding the schematics and the different circuits which is kinda late considering I've already been in it messing around, but really I feel a lot more confident repairing other big jobs now.
And, before anything else, thank you to Markyboard and everyone else here in in the groups that helped me figure out things as I went along. This was a big job, no question about it. A lot was changed, and I am sure it's been improved. I did a burn-in overnight after tuning all 6 voices and still tuning up perfectly. Decided to button her up and put her back in rotation with the other classics....
Final oscillator tuning and calibration:
New Noctua fan:
Voice boards (new sockets installed for all Curtis chips and all ribbon connectors, along with full re-cap and some 4016s replaced):
Close-up of voice cards with new trimmers installed:
2 of the 3 EPROMS for the 2.4 OS that broke. my. bawls. trying to burn until I gave in and got a good burner and eraser:
All buttoned back up:
Quite possibly the best thing any Memorymoog owner could see:
Of course, I still have my doubts because... Memorymoog... but, I'm honestly very pleased with how this all came out, and it really taught me a lot in terms of really reading and understanding the schematics and the different circuits which is kinda late considering I've already been in it messing around, but really I feel a lot more confident repairing other big jobs now.